

Adding CSS Animations to Your Squarespace Site
Update: This article will teach you how to incorporate Justin Aguilar's CSS Cheat Sheet animation library into your Squarespace site. Check out Part 2 if you want to incorporate Daniel Eden's Animate.css animation library instead/as well!
What are CSS Animations?
When you visit websites, you are usually used to seeing static images and text that fixed in their location on screen. As a result, going through a website is a lot like reading a newspaper or a book, plus scrolling.

CSS Animations are basic animations that you can add to elements (like pictures or text) on a website to make those elements move on screen at a given point or when revealed upon scrolling down (referred to as a "Scroll Event").
CSS is a style language used on websites to add features like background, text styling, etc with dynamic and relatively straightforward code.
Can You Add CSS Animations to your Squarespace site?
Yes! However, until this blog post, there was literally no single, comprehensive and accurate tutorial to guide people in successfully implementing these fun animations into a Squarespace site. In over 10 hours of research, the closest I found was this Squarespace Answers Thread, however personally, I found it full of dead ends and technical shorthand that left me clueless. Finally, I worked alongside Drover programmer Neel Patel to figure it out... and we did! The following guide will walk you step-by-step through the process of adding CSS Animations to your Squarespace.
A Precautionary Note
A quick heads-up before you begin:
- You do not need to know how to code/program to follow this tutorial, although rudimentary knowledge of CSS will be helpful
- You need to use Google Chrome Browser on a Mac, PC, or Chromebook
- This method implements Justin Aguilar's CSS Animation Cheat Sheet into your site, As a result, the CSS Animations you will have available will be limited to those in his cheat sheet. A few other CSS Animation libraries do exist and can be implemented similarly, although there are nuanced differences in the process to do so. I might publish another tutorial in future to help implement those animation effect libraries into Squarespace. If this would be helpful to you, please indicate as such in the comments.
- This tutorial depends on a pre-written list of animations. It is up to you whether or not you feel the finished effect of implementing these animations onto your site is professional or conducive to your brand.
- I developed this tutorial on the Bedford theme. It *should* work on other themes, but I have not tested this.
Understanding How Your Site's Animations Will Work
Your Squarespace site's CSS Animations will work as follows:
- Justin Aguilar's CSS Animation library will be incorporated to the code of your site.
- You will be able to assign an animation from the library to ANY block on your site, whether it be an image block, text block, etc.
- Your animations will be triggered upon a scroll event -- meaning, when your visitors scroll down to a certain point in your website, the animation will be triggered a single time, and then the animated block will fill a fixed position.
Let's Begin
Step 1: Download the Animation Library
First, you need to download Justin Aguilar's CSS Animation Library to your computer. For your convenience, I have already downloaded his .css file and attached it to the button below. All you need to do is click on it and save the file to your computer. If for some reason you want to download it yourself, go here, right click and save.
Step 2: Upload the Animation Library to Squarespace
In order to use the animation library we just downloaded within your Squarespace site, you need to upload it to your site's file storage -- included with your Squarespace plan. You most likely have not interacted with this storage space, as Squarespace does not really encourage its use. If you want to read more about their thoughts behind this see this support article.
In order to upload a file to your Squarespace site, you have to create a text box (or use text from an existing text box) and create a hyperlink for that text. So, you're sub-steps for this part are:
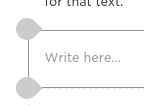
- Create or use an existing text box
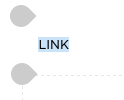
- Add a hyperlink to a word or some text within that text box using the dark grey, horizontal text editor bar
- This generates the hyperlink window, which gives you the choice of linking your text either Content, Files, or External (last pic in slideshow)

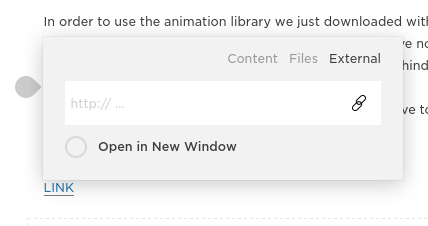
Once the hyperlink options window is open, click on FILES. Then, click on ADD A FILE. Upload the animation library file, which is called "animations.css".
At this point, the animation library is successfully uploaded into your Squarespace file storage. DO NOT unlink or delete your hyperlinked text right now. We need it still for Step 3.
Step 3: Determine the HTML Link to your Library on your Site
Now that you have uploaded the animation library CSS file to your Squarespace site, that file has a specific and unique HTML link to where it is hosted within your site. You need to get this link for a later step. The purpose of uploading the file to your site's storage and then getting your localized HTML link is to always maintain control of hosting the animation library... meaning, if Justin Aguilar shuts down his site for some reason, your animations will continue working because the style sheet he made is now hosted on your own domain!
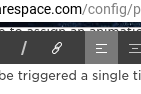
In order to obtain your file's link, you need to hover over your hyperlinked text from Step 2. Then, CLICK once on the hyperlinked text. That will generate a small window above the hyperlinked text offering you to remove or edit the link. In the left side of that small window is a part of your file's HTML link. See the picture below. I am referring to "/s/animations.css"
Now, that "/s/animations.css" is only PART of your file's full HTML link. The rest, to be filled in on the left, is your Squarespace editing domain that Squarespace gives you when you are in the editor -- usually based on your name. You can find this in your address bar whenever you are editing your Squarespace. For example, if your name is John Snow and you are editing your Squarespace site right now, your address bar will read something to the effect of "https://john-snow.squarespace.com/................"
Your file's FULL HTML link is the "https://name-name.squarespace.com...." bit PLUS the /s/animations.css bit. So, something like:
https://john-snow.squarespace.com/s/animatiions.css
Step 4: Header Code Injection
In order to make your CSS animations work on your site, you will have to add custom code (which I will provide you with) in three places on your site. This is the first.
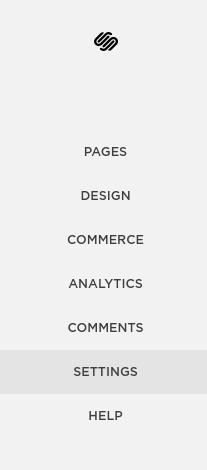
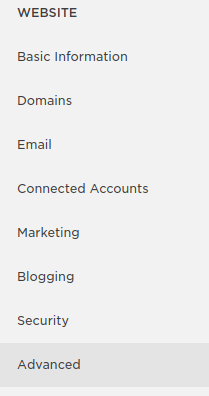
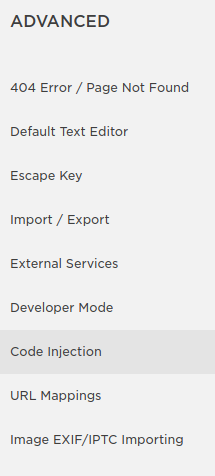
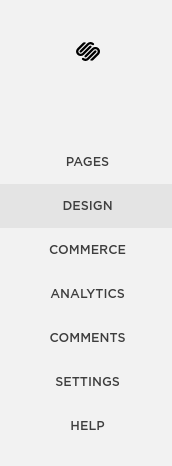
From the main Squarespace menu, CLICK on Settings --> Advanced (under Website) --> Code Injection.
This will take you to where you need to be.

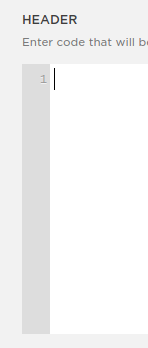
Inside the Header Code Injection section, you need to insert the following text:
<script src="https://code.jquery.com/jquery-2.1.3.min.js"></script>

<link rel="stylesheet" type="text/css" href="https://john-snow.squarespace.com/s/animations.css">
*** Now, obviously replace the file link (which I italicized) with your file's specific HTML link, which you found in step 3.
Save/leave the Header Code Injection menu.
Step 5: Determine The Unique ID of the Block you Wish to Animate
Every block within your Squarespace site has a unique ID. In order to animate a specific picture or text block instead of EVERY picture or text block, you need to reference the animated block's unique ID in the code we are about to add. The easiest way I have found to discover the ID of each block on your site is to use this Chrome extension. As I said at the beginning of the tutorial, you need to be running Google Chrome browser for this to work. Add the Chrome extension to your browser.
Once it is added to Chrome, close down all of your Chrome tabs then reopen them. A black and white icon with a B should now be in the upper right hand corner of your Chrome browser window.
Still in the Squarespace editor, navigate to the page in which the block you want to animate is located. Once there, click on the B logo from the extension. This will cause the block IDs for all your blocks on that page to become visible.


Click on the ID of the block you want to animate, and it will be copied to your clipboard. Click on the B logo again to make the IDs go away.
Step 6: Add a Code Block
In this step, we will be adding a Code Block dedicated to commanding a single block to animate as you desire. You can put this block whereever you want on your page -- it is invisible except when EDITING a page. You could put it underneath the element you wish to animate for simplicity. Personally, I like to keep them at the bottom of the page, although if you are animating multiple blocks this could become a little bit confusing.
Within the code block, SET THE LANGUAGE TO HTML and paste the following code:
<div id="#block-yui_3_17_2_6_1459644649106_53673" class="slideUp">

 <script>

 $(window).scroll(function () {

 $('#block-yui_3_17_2_6_1459644649106_53673').each(function () {

 var topOfWindow = $(window).scrollTop(),

 bottomOfWindow = topOfWindow + $(window).height();

 var imagePos = $(this).offset().top;

 if(imagePos <= bottomOfWindow-100 && imagePos >= topOfWindow-250){

 $(this).addClass('slideUp');

 }else{

 $(this).removeClass('slideUp');

 }

 });

 });

 </script>
'** Again, REPLACE my block ID's in that code block (it occurs in two places, and I have italicized them) with YOUR block's ID.
KEEP the quotation marks as they are. Just REPLACE my block ID with yours.
***UPDATE: Modified Code Block code that will make the animation happen ONLY once, instead of repeat constantly upon scrolling over the animated block again:
<div id="#block-yui_3_17_2_6_1459644649106_53673" class="slideUp">
 <script>
 $(window).scroll(function () {
 $('#block-yui_3_17_2_6_1459644649106_53673').each(function () {
 var topOfWindow = $(window).scrollTop(),
 bottomOfWindow = topOfWindow + $(window).height();

 var imagePos = $(this).offset().top;

 if(imagePos <= bottomOfWindow-250 && imagePos >= topOfWindow+250){
 $(this).addClass('slideUp');
 }
 //else{
 //$(this).removeClass('slideUp');
 //}
 });
 });
 </script>
&&& Also, note that you can CHANGE WHEN THE ANIMATION HAPPENS by changing the "bottomofWindow" and "TopofWindow" values from 250 to whatever you wish.
Someone in the comments asked if could make the animation work upon page load, not scroll... to do this, just set the values that are currently "250" low enough that this happens as soon as the page loads, because the window positions will be fulfilled. Note this will only work for animated elements within the initial loading window (aka the top of your web page) on most laptop/desktop screens. For animated elements below this point, if you animate them when the page loads, your viewers will not see the animations because they weren't on that section of the page yet. The nice thing, however, is that you can adjust those triggering pixel ranges (currently both 250 in my code) for each individual animated element.
Step 6: Program the Scroll Event
If you have correctly followed these steps until now, you block should be animated, however it appears briefly in a fixed position, then animates. This looks bad. To fix this, we have to add a third bit of custom code. This code will make your block hidden temporarily until the scroll event happens.
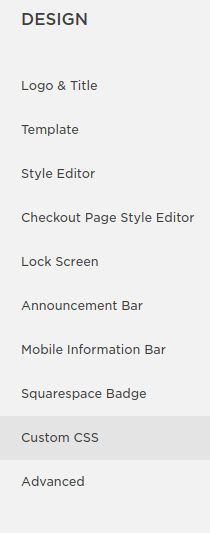
In the main Squarespace menu, go to Design --> Custom CSS.
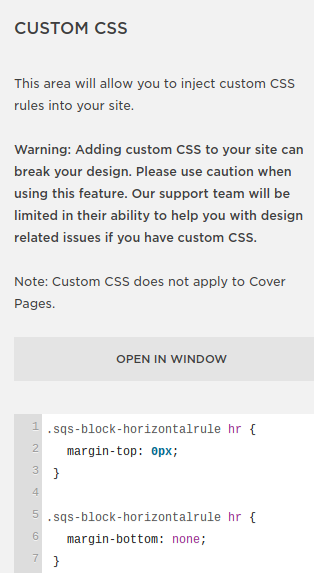
In Custom CSS, paste the following code:
#block-yui_3_17_2_6_1459644649106_53673{
background-color: #ffffff;
visibility: hidden;
}
As always, REPLACE my block ID (italicized) with yours. Also, the background color #ffffff is solid white. If your background is a different color, be sure to replace that also with the #colorcode of your background.
Step 7: Enjoy and Customize
That's it! At this point, if you have followed this tutorial successfully, your block should be animated! As you move forward and dig deeper into your newfound ability, I will leave you with some notes.
- Remember that, to animate additional blocks, you will need to create additional CODE blocks and then repeat Steps 5 & 6. You will also need to add another Custom CSS entry (Step 6). Remember to insert the unique block ID of the new block you wish to animate into the new CODE block and Custom CSS entry.
- This tutorial starts you off with the "SlideUp" animation. However, you can program your block to use any of Justin's animations. In case you want a reminder of all that are available in the library, here is his list

Justin Aguilar's CSS Animation Library Animations
2. continued) If you want to incorporate a different one of Justin's animations, you need to replace "slideUp" with the name of the new animation in the three places it occurs in the code we inserted into the CODE block (Step 5). Please note, the names of these animations are case sensitive and if you don't type them in correctly, the animation will not work. To be sure you are typing in the right name, go back to Justin's original animations.css file that we uploaded into your Squarespace site and Ctrl+F to search for the name of the animation you want to implement and copy how he spells it in the animations.css file.
That's all I have for you! If this tutorial helped you, or you have any questions, please feel free to comment below.
Check out PART 2 -- How to Implement Animate.css (a larger library of animations) into your Squarespace site!
---
Patrizio Murdocca is Chief Web Developer at Drover Rideshare, a student at Vanderbilt University, and President of Interfaced Ministries (www.interfacedministries.org).
